Difference between revisions of "How to activate the Facebook App"
From hoteliga
(Created page with " File:Image (4).png File:Image (5).png File:Image (6).png File:Image (7).png File:Image (8).png") |
|||
| Line 1: | Line 1: | ||
| + | |||
| + | Login to your Facebook page | ||
| + | |||
| + | Login your hoteliga account | ||
| + | |||
| + | Go to '''Options => Booking engine | ||
| + | ''' | ||
| + | Click '''Add Facebook tab | ||
| + | ''' | ||
[[File:Image (4).png]] | [[File:Image (4).png]] | ||
| + | |||
| + | |||
| + | Click '''Add to Facebook page | ||
| + | ''' | ||
[[File:Image (5).png]] | [[File:Image (5).png]] | ||
| + | |||
| + | |||
| + | Select the page you want to add the tab to. | ||
| + | |||
| + | Click the button '''Add Page Tab''' | ||
[[File:Image (6).png]] | [[File:Image (6).png]] | ||
| + | |||
| + | Go inside your Facebook Page at '''Settings => Templates and Tabs''' | ||
| Line 16: | Line 36: | ||
| + | You ll find a tab calLed '''hoteliga booking engine''' | ||
| + | |||
| + | Click on '''Settings | ||
| + | ''' | ||
[[File:Image (8).png]] | [[File:Image (8).png]] | ||
| + | |||
| + | |||
| + | Click '''Edit settings''' | ||
| + | |||
| + | |||
| + | [[File:Image (9).png]] | ||
| + | |||
| + | |||
| + | You can give any name to the tab, eg. "Book now", "Reservations" etc. | ||
| + | |||
| + | Click '''Save''' and '''OK''' | ||
| + | |||
| + | |||
| + | [[File:Image (10).png]] | ||
| + | |||
| + | |||
| + | |||
| + | On your Facebook page, at the Left you will see the new tab added. | ||
| + | |||
| + | |||
| + | [[File:Image (11).png]] | ||
| + | |||
| + | |||
| + | |||
| + | Click on the New "Book now" button | ||
| + | |||
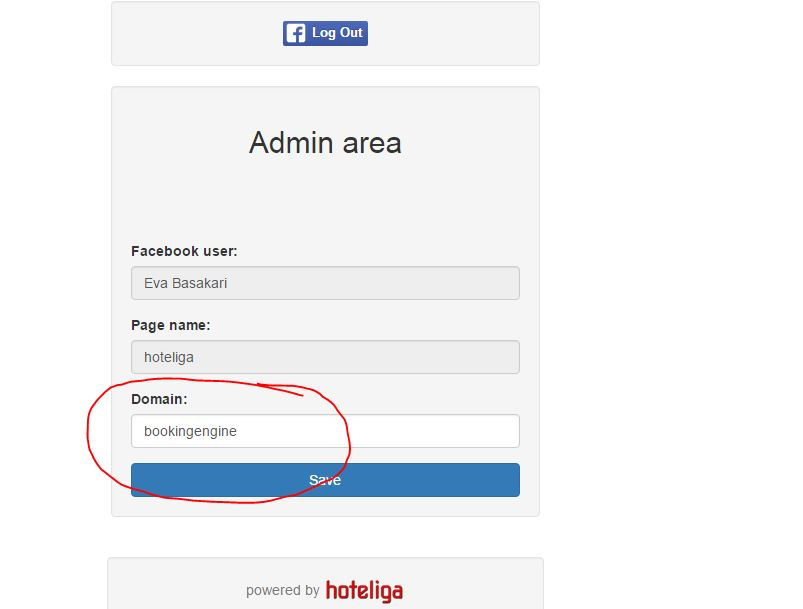
| + | Type your '''domain name''' and '''Save'''. | ||
| + | |||
| + | |||
| + | [[File:Image (12).png]] | ||
Revision as of 14:26, 13 March 2019
Login to your Facebook page
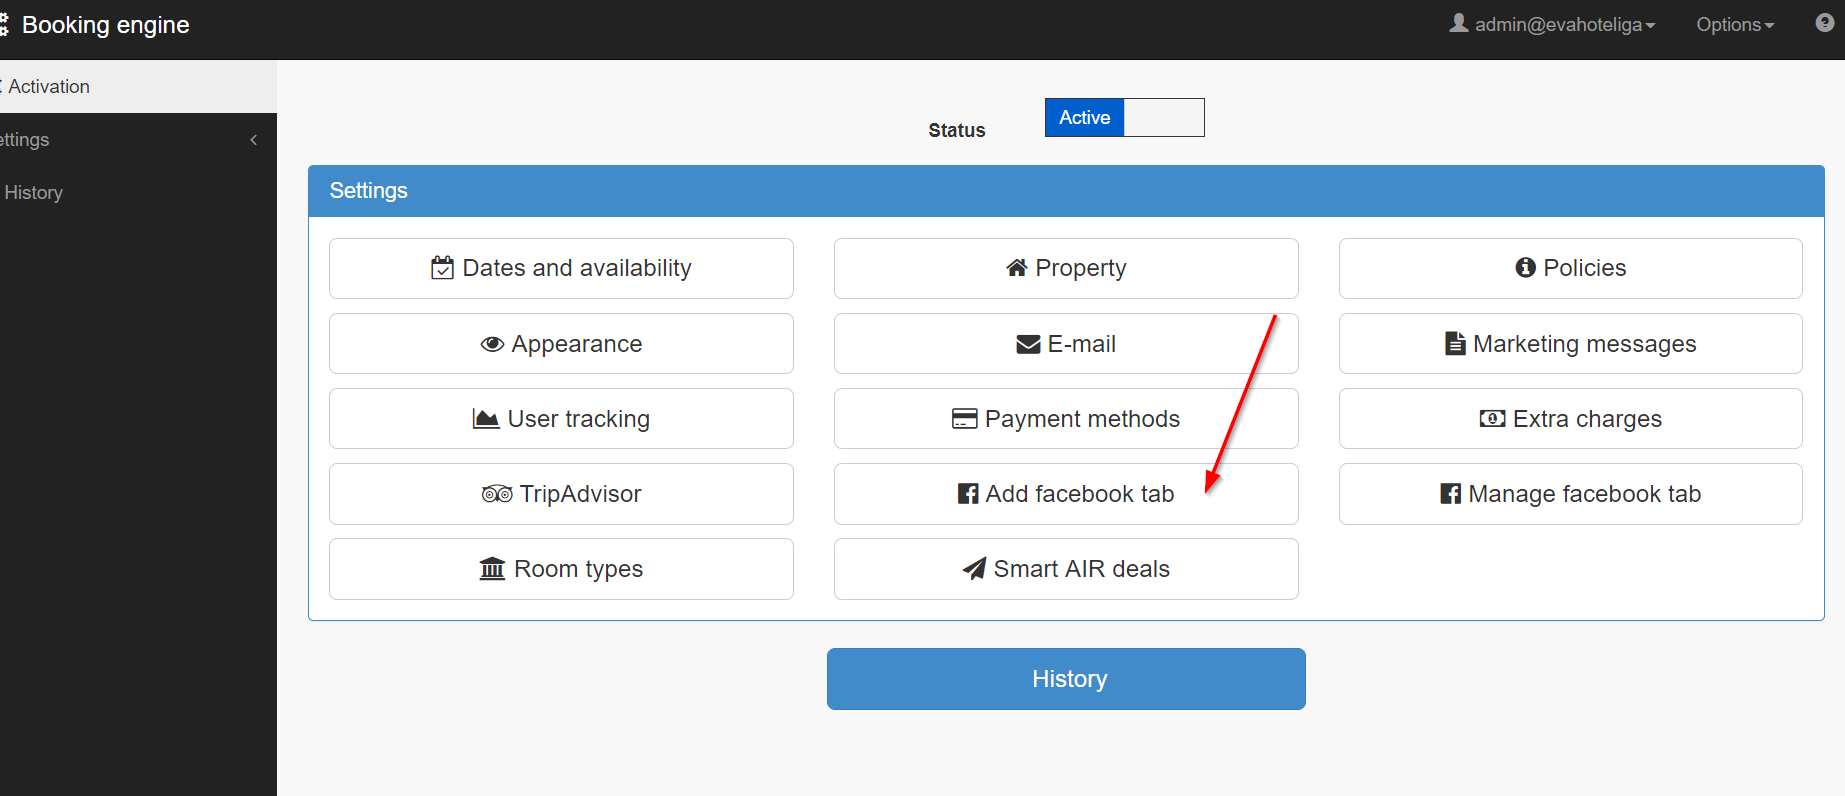
Login your hoteliga account
Go to Options => Booking engine Click Add Facebook tab
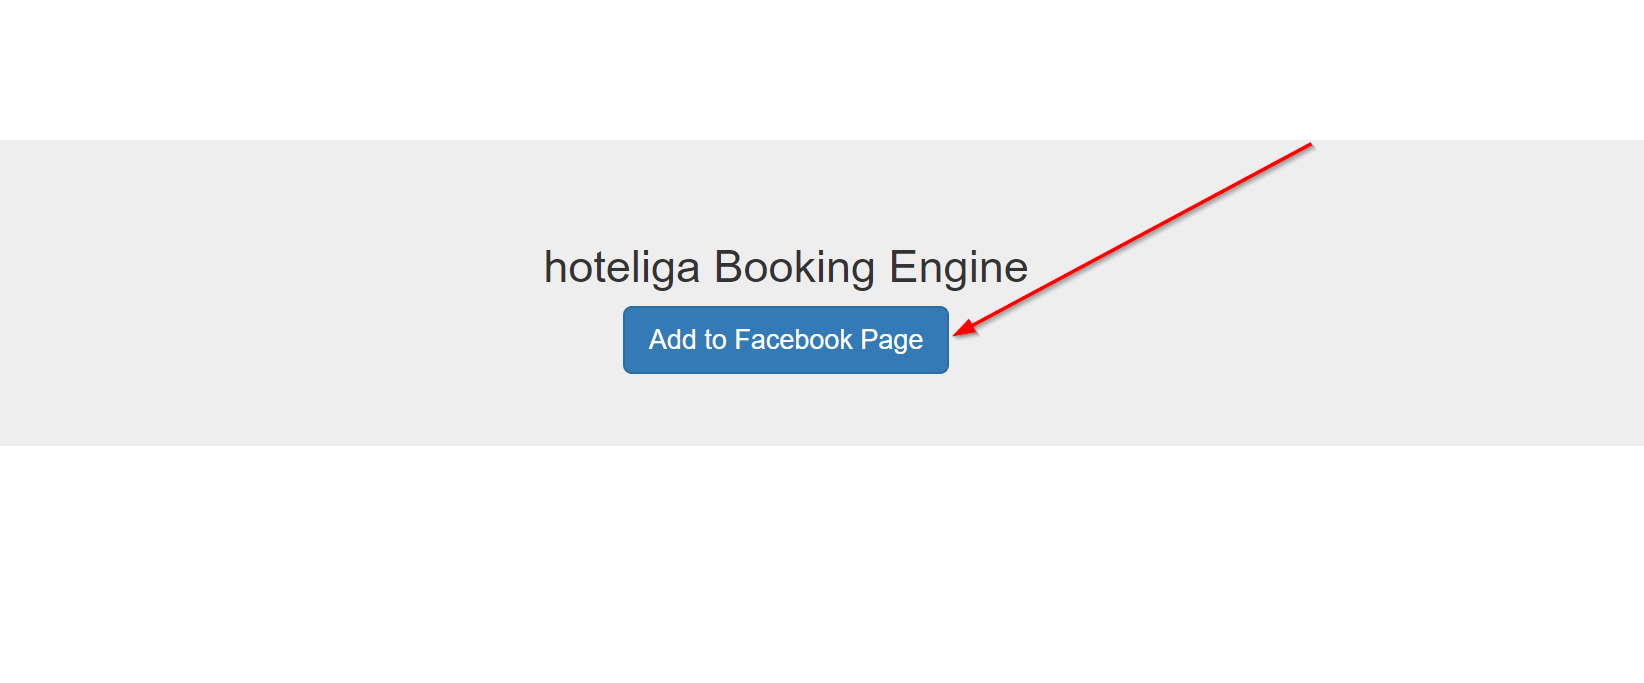
Click Add to Facebook page
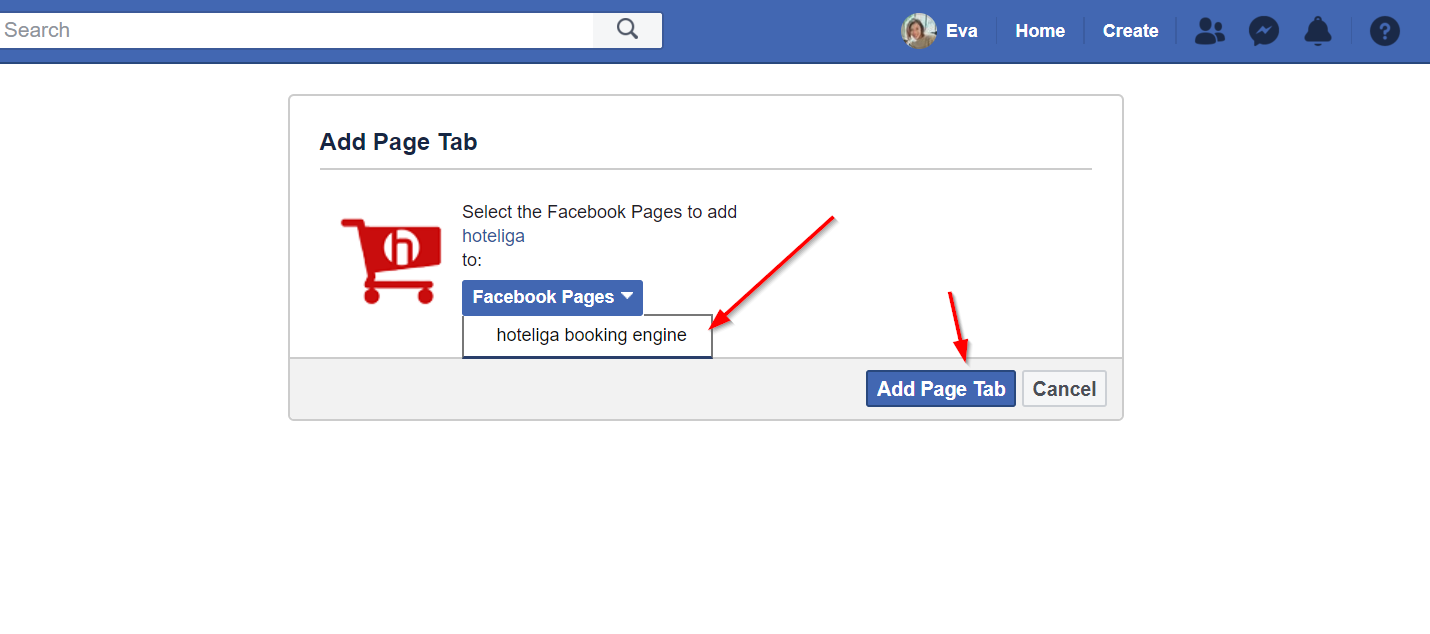
Select the page you want to add the tab to.
Click the button Add Page Tab
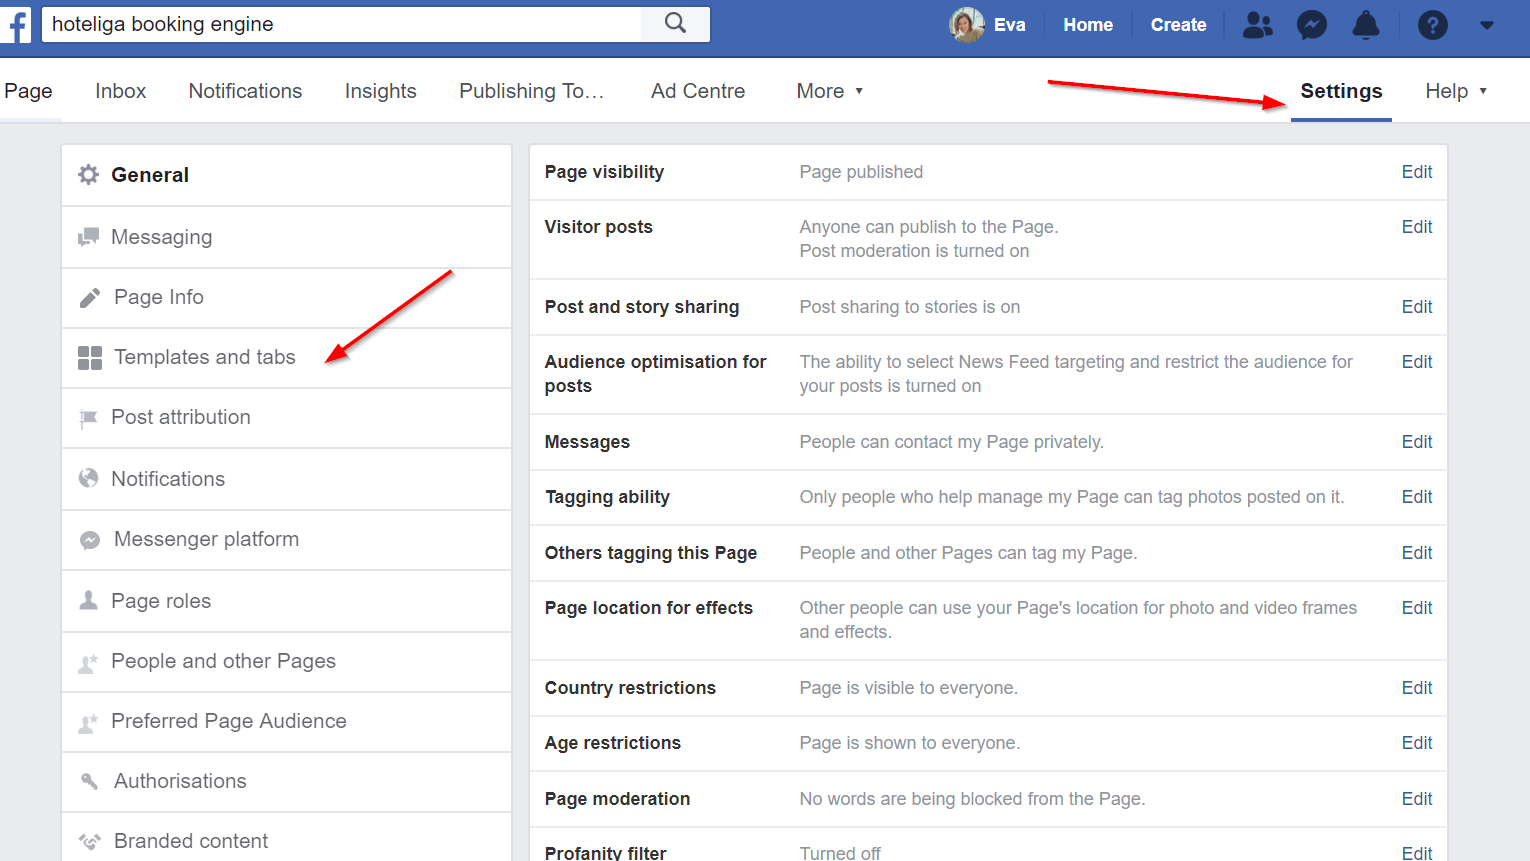
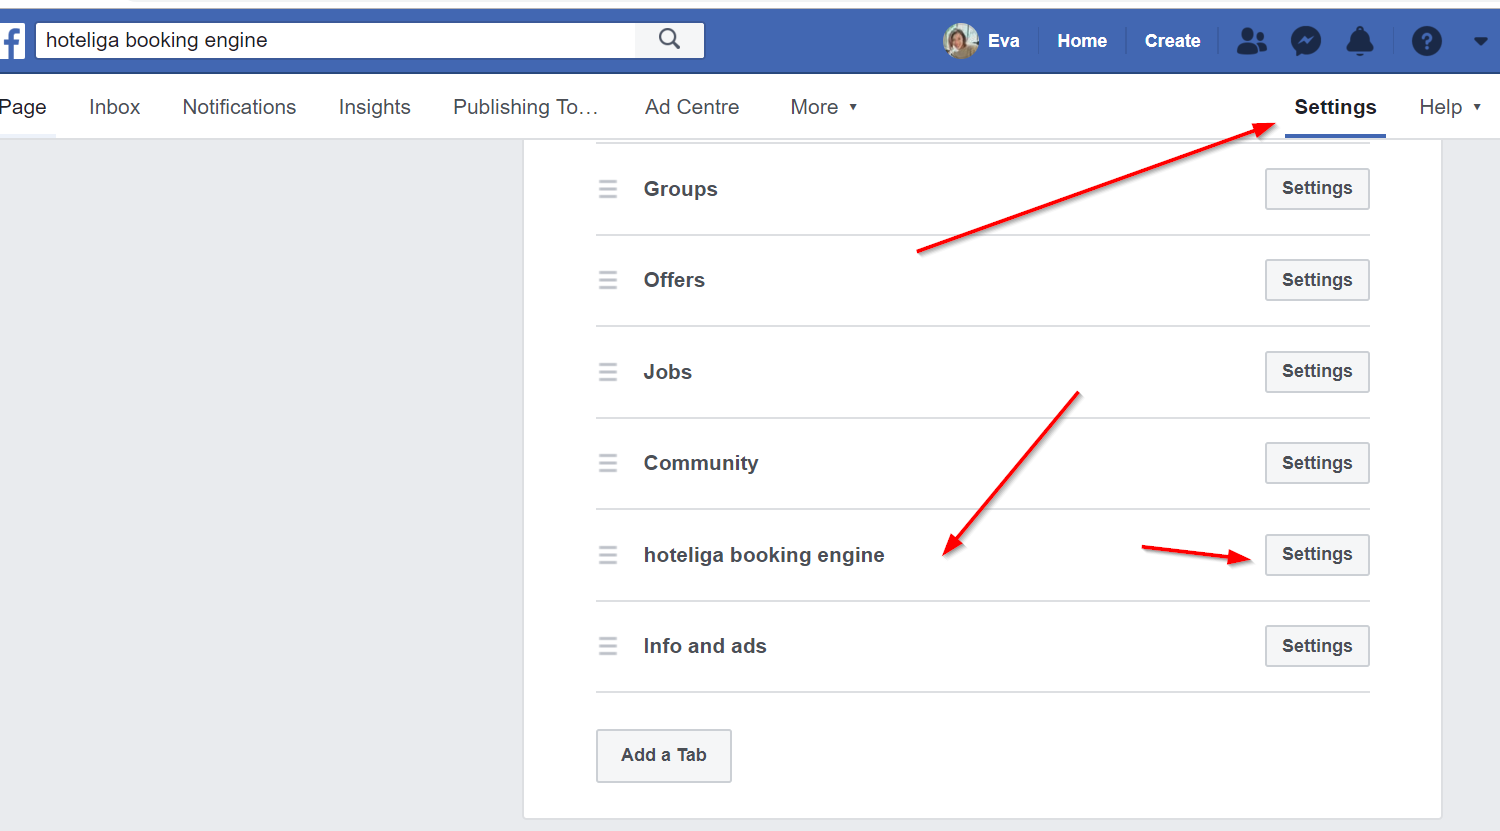
Go inside your Facebook Page at Settings => Templates and Tabs
You ll find a tab calLed hoteliga booking engine
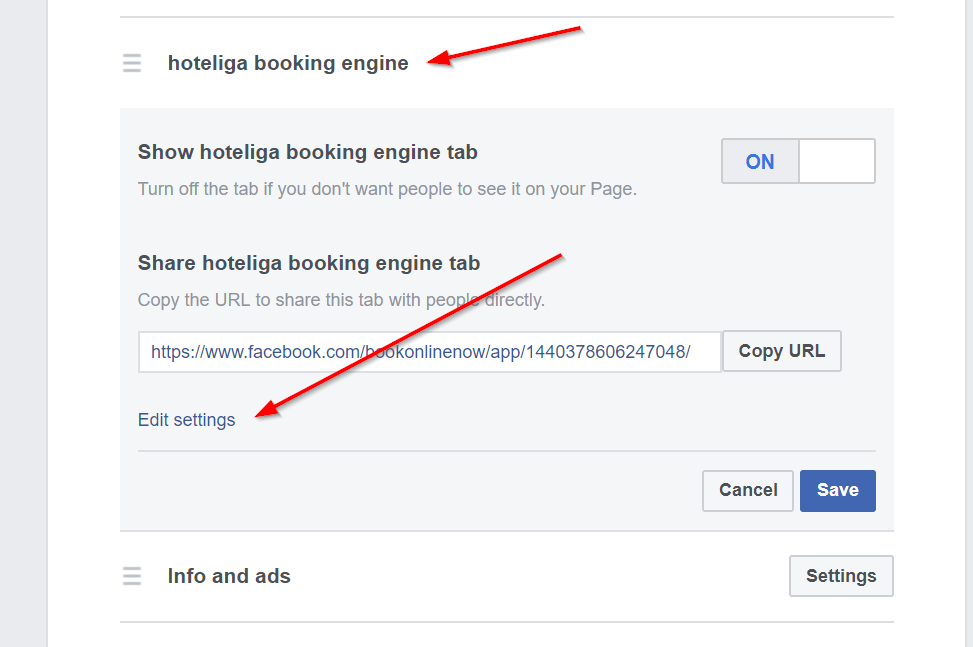
Click on Settings
Click Edit settings
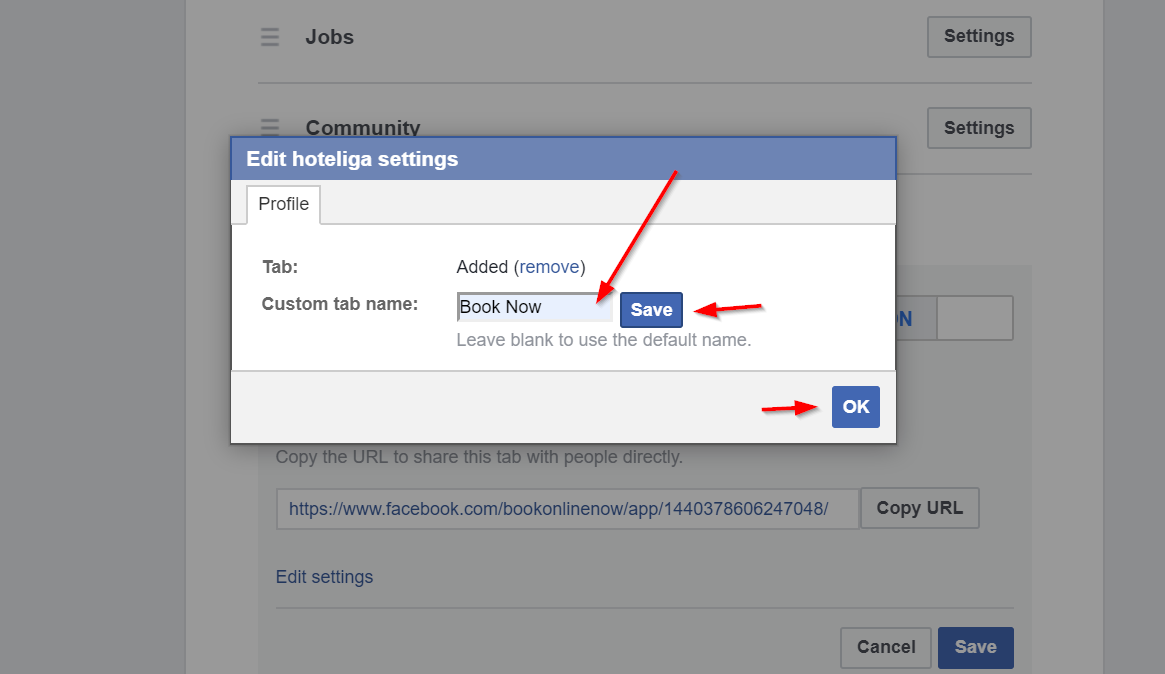
You can give any name to the tab, eg. "Book now", "Reservations" etc.
Click Save and OK
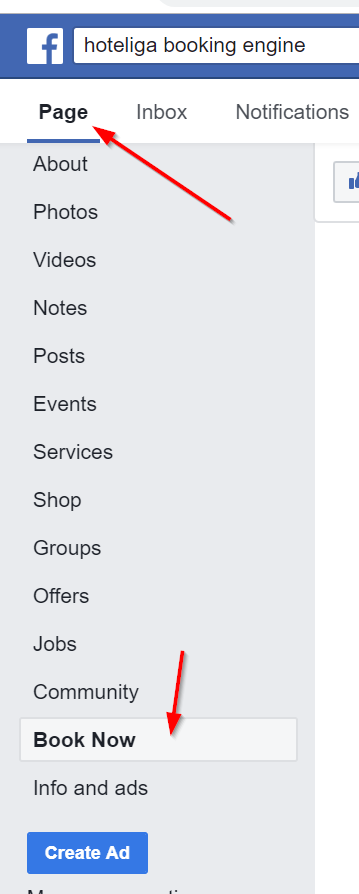
On your Facebook page, at the Left you will see the new tab added.
Click on the New "Book now" button
Type your domain name and Save.
