Difference between revisions of "The Reservation Window"
(→Extras) |
(→Extras) |
||
| Line 135: | Line 135: | ||
<br><br>[[File:res_window_extras_3_en.png|900px]]<br><br> | <br><br>[[File:res_window_extras_3_en.png|900px]]<br><br> | ||
| − | When you enter | + | When you enter extra charges the title and the subtotal will be shown in the left table as well. |
<br><br>[[File:res_window_extras_4_en.png|900px]]<br><br> | <br><br>[[File:res_window_extras_4_en.png|900px]]<br><br> | ||
Revision as of 09:51, 14 September 2017
Contents
Introduction
The Tabs
Basic Data
The field 'status' defines the status of a reservation. The possible options change every time you open or save a reservation, and are related to the stage the reservation is. See Reservation Statuses for more details.
By clicking on one of the lines it pops up a window with further information about this reservation that we can also change if we want to.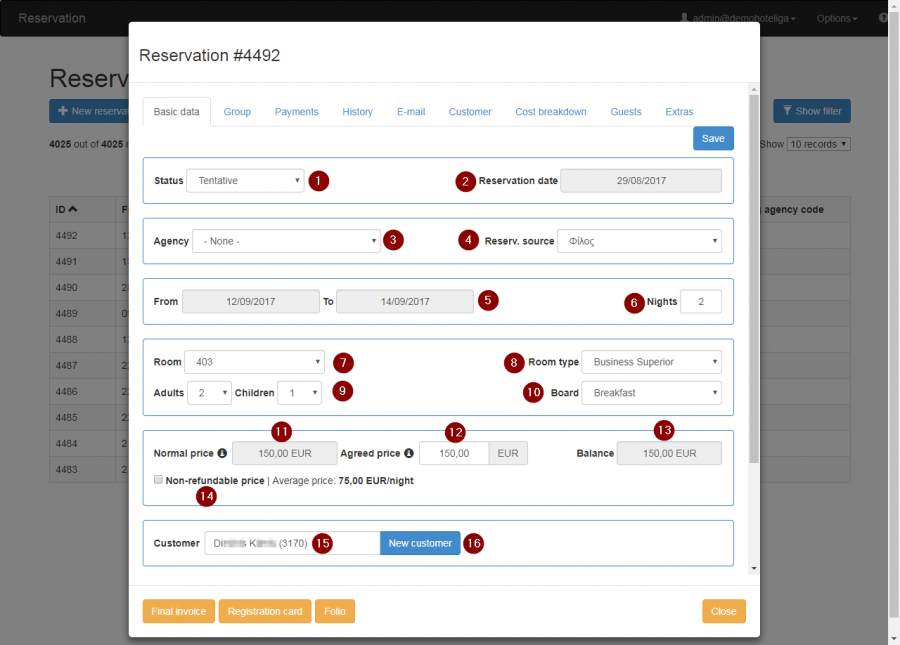
In Basic Data we see:
- Once again the reservation's Status
- The Reservation date: when this reservation was added to the system
- The Agency: if this reservation came e.g. from Booking it would be shown here
- The reservation source: it could also mention Booking, Expedia etc or any other source such as "friend"
- The dates this guest stays
- The nights of his stay
- Which room he has booked
- What type of room that is
- The number of Adults and Children
- The Board: if they have booked an all inclusive or just a room for example
- What's the Normal price for that room
- What's the agreed price
- The Balance
- The checkbox will indicate if it's a non-refundable price
- The name of the guest
- The "New Customer" button leads us to add information about a new customer.
If you scroll down in that window you'll see a blank space for Notes as shown in the following picture.
If you do any changes, please don't forget to click "Save".

Group
The second tab is very helpfull when a customer has made bookings for more than one room under his name. 
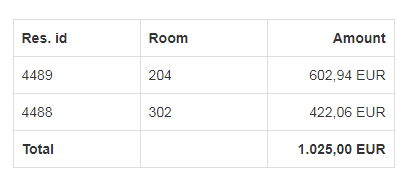
We have an example in the following picture where we see that two bookings have been grouped under a customer's name.
In the first column of the table we see the resident's ID, the second column shows in which room they're staying and the third column indicates the charges per room. The last line states the total amount of money he will be charged.
Payments
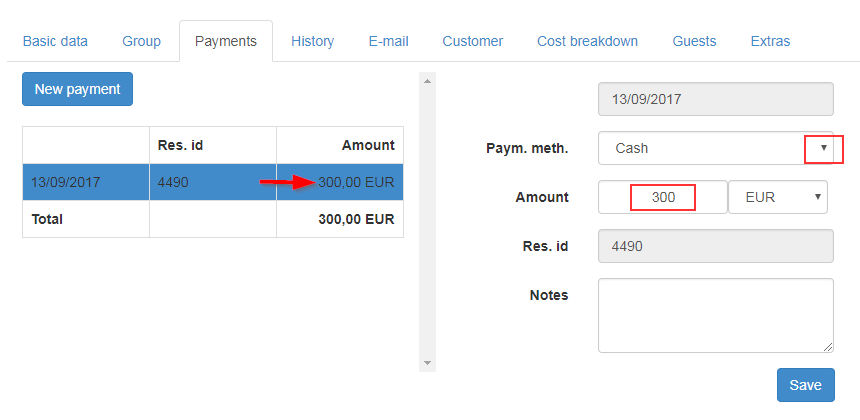
In this field new payments are added by clicking on the "New Payment" button.

On the right, by clicking on the downward triangle button (1) to show all the available methods you can select the payment method a guest is paying with e.g. Cash , MasterCard, Visa etc
Then, write the amount (2) and add some notes if you want on the blank space provided (3).
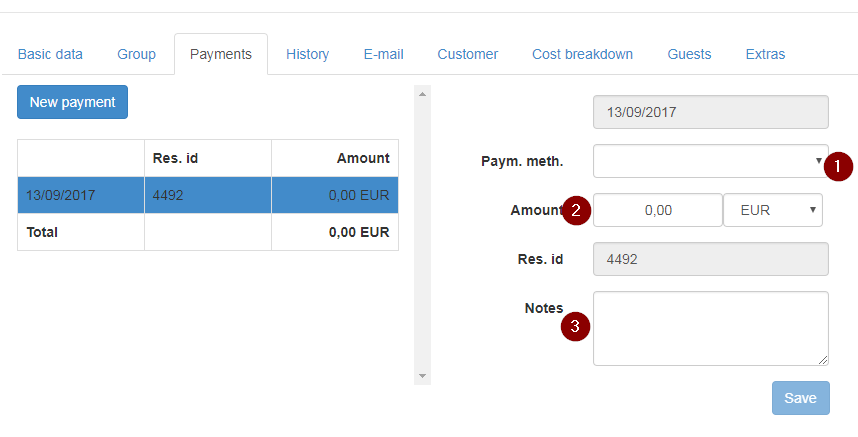
When entering an amount of payment you will see it automatically added in the table on the left.
History
The next tab in the Reservation Window is History

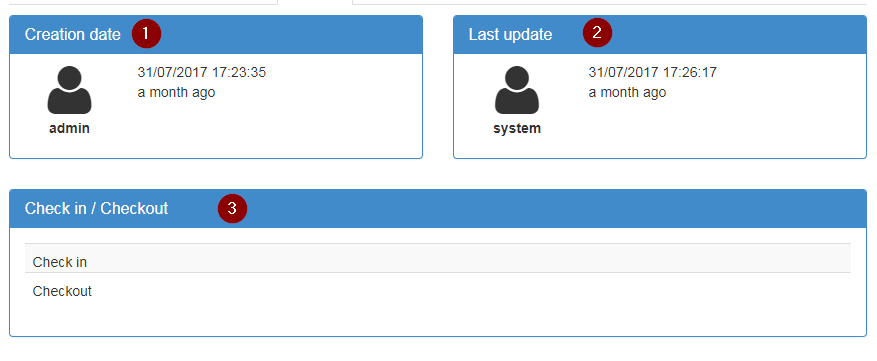
Here we can see when this reservation was created (1) and by whom, when was its last update and who did it (2) and if there has been a check in or check out (3) next to check in or check out it will show the date and time.
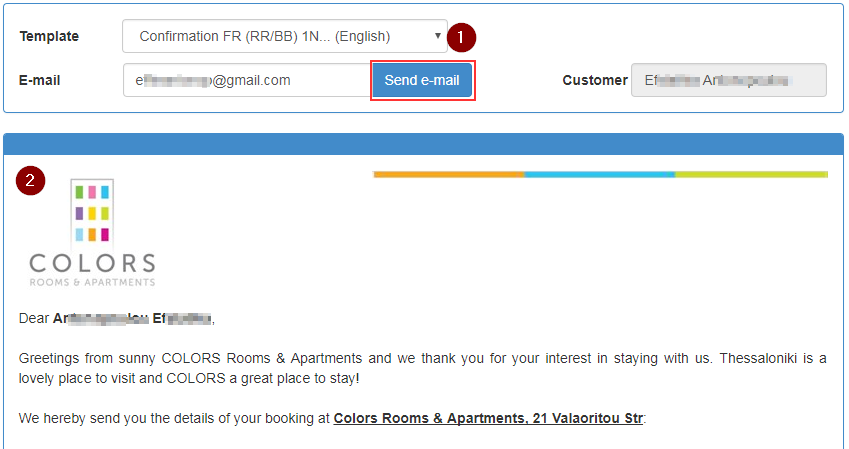
The next tab is E-mail which allows you to send an e-mail to your guest.

In this field you can see your customer's e-mail and his name. By clicking on Template a list of e-mail templates will appear.

There you can select the e-mail you want to send to the customer e.g. Confirmation and preview it right below. If you want to send the e-mail, you can do it by clicking "Send"
Customer
This tab provides us with our guest's information.

We have:
- Guest's first name
- Last name
- Phone number
- Mobile phone number
- E-mail
- Country
- State or Province
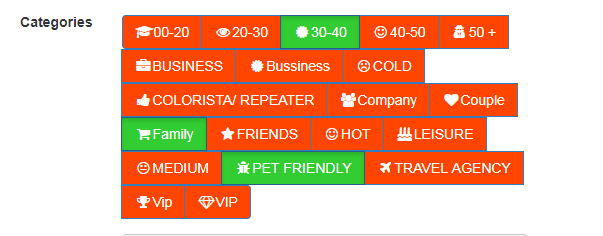
Right below we have the categories a customer could fit. Here we haven't selected any category so everything is orange.
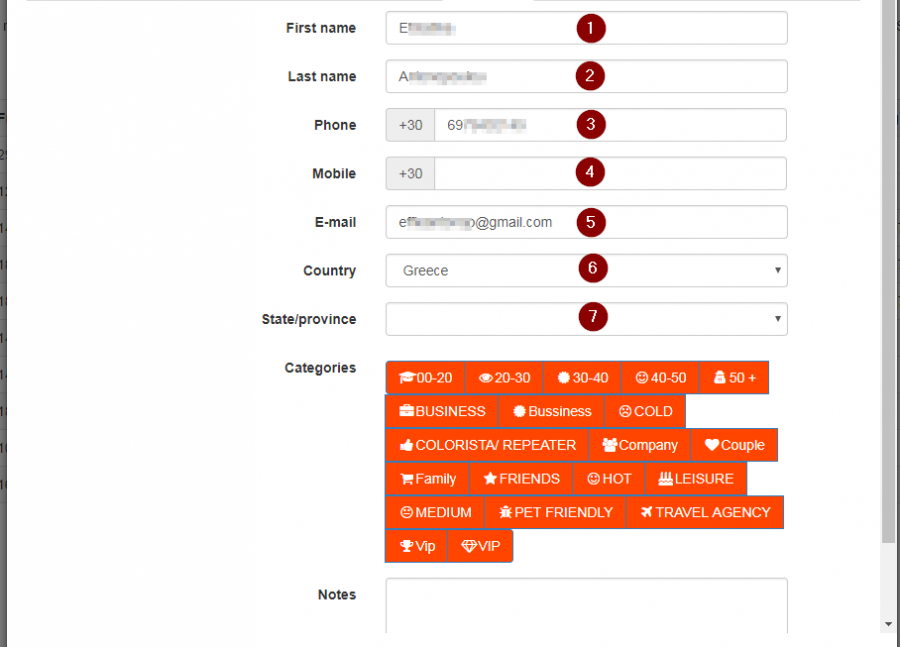
If we want to select one or more categories we can simply click upon that button and it changes color
Cost Breakdown
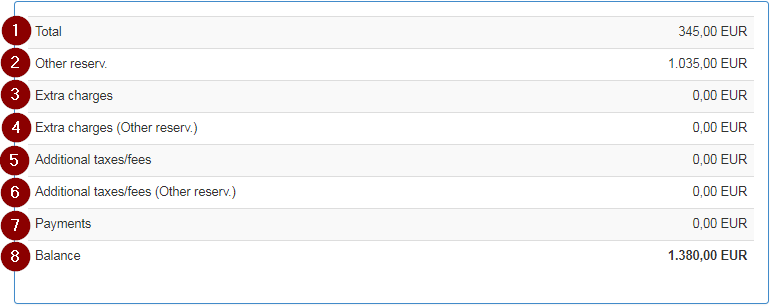
This tab shows in detail what this guest has to pay.

It shows:
- The Total (this is described later on in detail)
- Other reservations (as we saw before some customers may book more than one room under their name)
- Extra Charges
- Extra charges on Other reservations
- Additional taxes/fees
- Additional taxes/fees on Other reservations
- Payments
- Balance
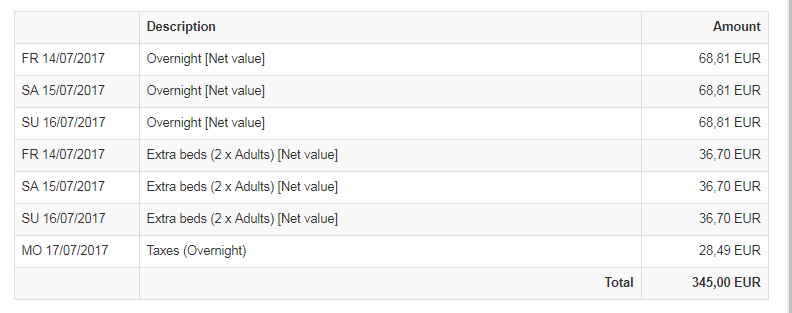
The Total is explained in the table right below where it indicates the cost of an overnight stay, of extra beds, taxes etc.
Guests
In this tab we can add a guest
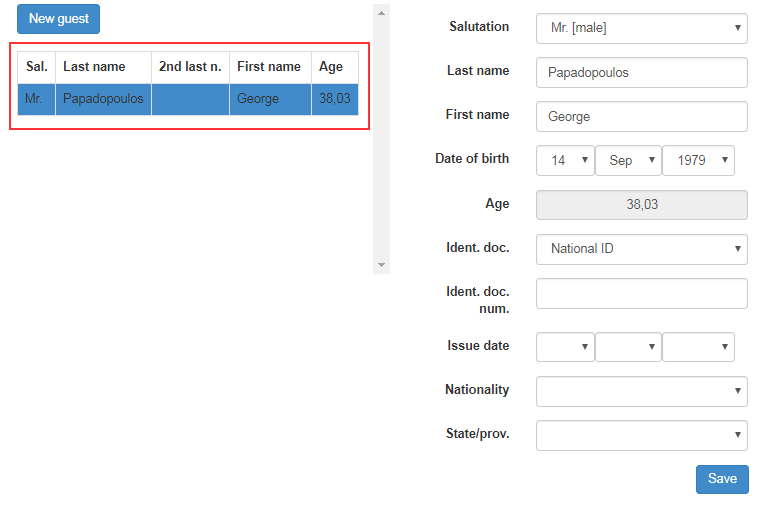
A guest is added by clicking upon the "New Guest" button on the right.
Then, a form is shown on the left where you can add the guest's information: a salutation (1), last (2) and first name (3), date of birth (4), the age (5) will be automatically calculated, the identification document (6) e.g. passport, ID, etc, the identification document's number (7), the issue date (8), guest's nationality (9), state/province (10)
Remember to Save any information you add.
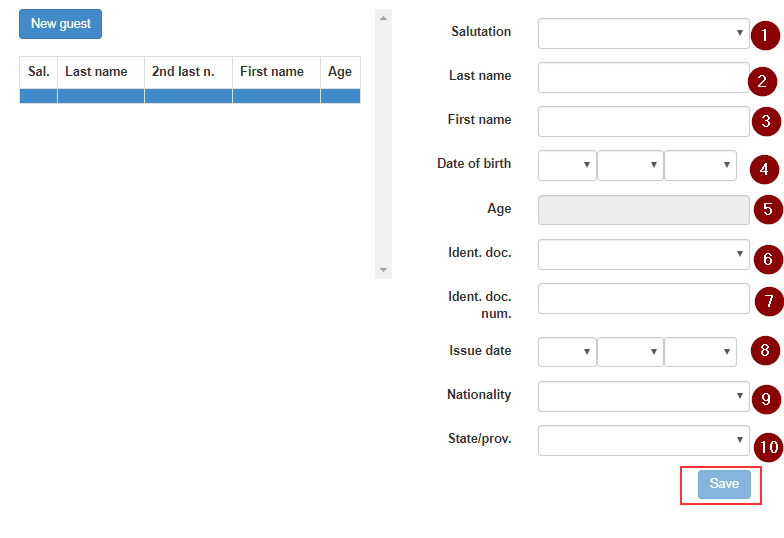
While adding the data it will show it in the table on the left, as seen in the example picture below.
Extras
This tab allows you to add extra charges to the guest

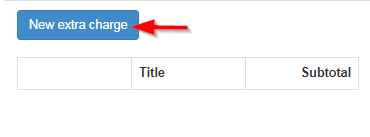
By clicking on the "New Extra Charge" it opens a form on the right.
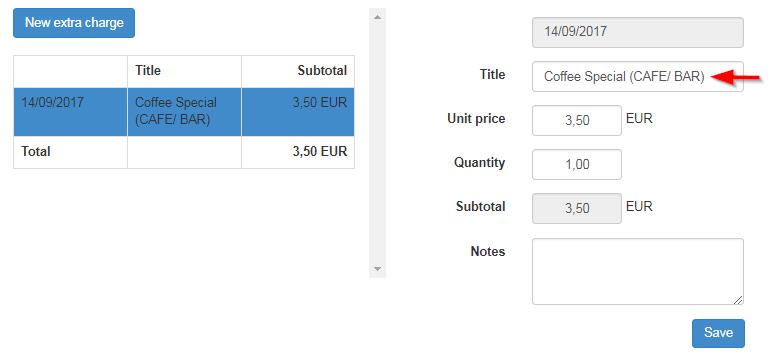
On that form you can write on the title (1) what he will be charged for. If this has been entered before by typing some letters the system will show you a list of selections, if not you can add it now. Then add the cost per unit (2) and the quantity (3). It will automatically calculate the cost in subtotal (4). Notes (5) allow you to enter any information you consider needed about this charge.
When you enter a charge the "Save" button will stop being transparent. Press it to save your extra charges.
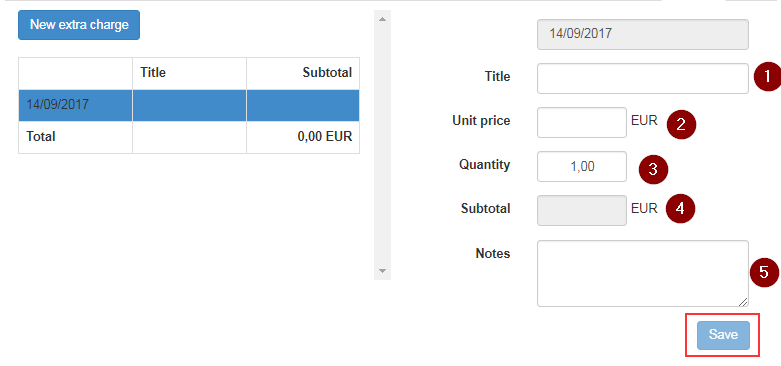
When you enter extra charges the title and the subtotal will be shown in the left table as well.
