Difference between revisions of "The Dashboard (Home Page)"
From hoteliga
| Line 4: | Line 4: | ||
[[File:Dashboard en.png|1200px]] | [[File:Dashboard en.png|1200px]] | ||
| + | |||
| + | On the top area, there is always the black toolbar with three things: | ||
| + | |||
| + | {| class="wikitable" | ||
| + | |1 | ||
| + | |Display of the current logged-in user, in the form username@domain. For example, if you are the user "reception" of domain "theboutique", it would display "reception@theboutique". By clicking on this menu, you can see the options of changing your password and logging out from the system. | ||
| + | |- | ||
| + | |2 | ||
| + | |Pie | ||
| + | |- | ||
| + | |3 | ||
| + | |Ice cream | ||
| + | |} | ||
| + | |||
{| class="wikitable" | {| class="wikitable" | ||
|+Dashboard | |+Dashboard | ||
Revision as of 10:45, 23 September 2017
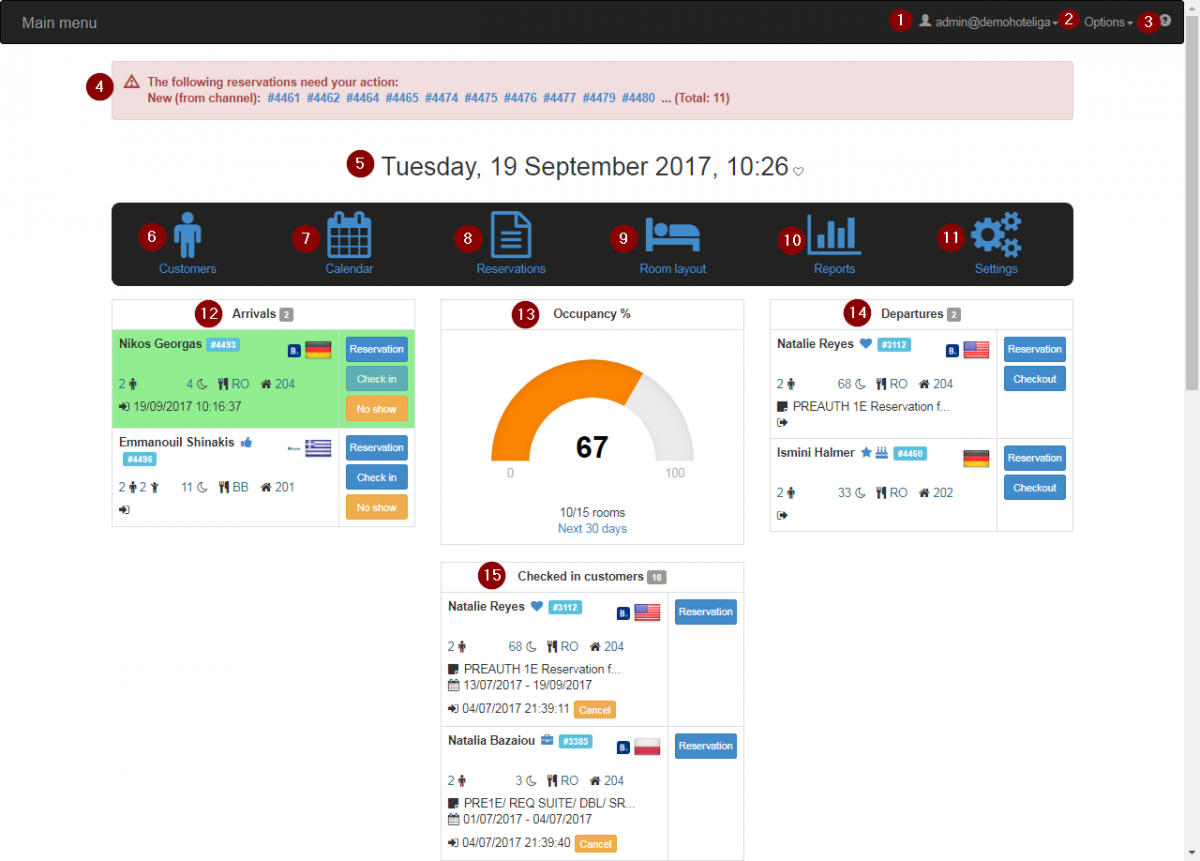
The Dashboard, or the home page, is the first page that you see when you enter the system.
In a normal day, the Dashboard would look like this:
On the top area, there is always the black toolbar with three things:
| 1 | Display of the current logged-in user, in the form username@domain. For example, if you are the user "reception" of domain "theboutique", it would display "reception@theboutique". By clicking on this menu, you can see the options of changing your password and logging out from the system. |
| 2 | Pie |
| 3 | Ice cream |
| 1. My Profile: Change your password here or Logout: Log out from your account |
| 2. Options: Navigate through different parts of the system (Home, Customers, Calendar etc) |
| 3. Help: Directs you to help page where there is a guide on how to use hoteliga |
| 4. Notifications: Notifications about channel reservations and overbookings. By Clicking on the number of reservation it directs you to the reservation and you can edit it. |
| 5. Current Time and Date |
| 6. Customers: Directs you to Customers |
| 7. Calendar: Directs you to Calendar |
| 8. Reservations: Directs you to Reservations |
| 9. Room Layout: Directs you to Room Layout |
| 10. Reports: Directs you to Reports |
| 11. Settings: Directs you to Settings |
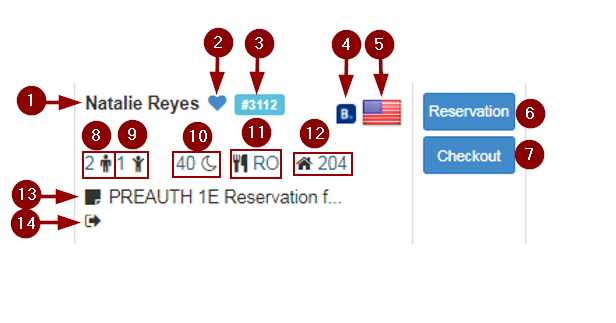
| 12. Arrivals: Shows the arrivals that are expected. By clicking on the check-in button it turns green. |
| 13. Occupancy: Shows the occupancy's percentage. Below it mentions how many rooms are occupied. |
| 14. Departures: Shows the departures that are expected. By clicking on the check-out button it turns green. |
| 14. Checked-in Customers: Shows the customers that have checked-in. |
You can easily check in and check out clients from the main menu.


