How to Use Google Analytics with the Booking Engine
Contents
Introduction
Google Analytics is a web analytics service offered by Google that tracks and reports website traffic. It is the most widely used web analytics service on the internet.
Google Analytics is used to track the website activity of the users, such as session duration, pages per session, bounce rate etc. along with the information on the source of the traffic. It can be integrated with Google AdWords, with which users can review online campaigns by tracking landing page quality and conversions (goals).
More information on Google Analytics can be found at Wikipedia's page
See the introductory video here:
The full list of videos the official Google Analytics YouTube channel can be found here.
The hoteliga Booking Engine and Google Analytics
The hoteliga Booking Engine supports integration with Google Analytics. In this way, you can have your property's website traffic monitored and analyzed along with the special web page of the hoteliga Booking Engine, which usually is in the form:
https://book.hoteliga.com/yourdomain
In the instructions below it is explained how to have in parallel two different views of statistics in Google Analytics, one for your property's website and one for the hoteliga Booking Engine.
Having a Google Analytics Account
Having a Google Analytics account is free. If you don't have one, visit this page and click on the "Start for free" button. Then your will need to start the process with your Gmail account.
If you don't have a Gmail account, click on "Create account".
Connecting your Google Analytics Account with Your hoteliga Domain
If you just got your Google Analytics account or if you already have such an account, you need to locate and note the Google Analytics tracking code that you will need later on.
Sign in in your Google Analytics account, and:
- Click on the "cogs" icon on the bottom-left of the screen.
- Click on "Tracking Info" option under the "Property" column.
- Click on "Tracking Code".
On the next page, your tracking code or tracking ID will appear with big letters, in the format UA-XXXXXXXX-1 as shown below:
Note this tracking ID (or copy it after selecting it with your mouse) as you will need to enter it in the hoteliga Booking Engine settings.
This video also shows how to locate the Google Analytics tracking ID:
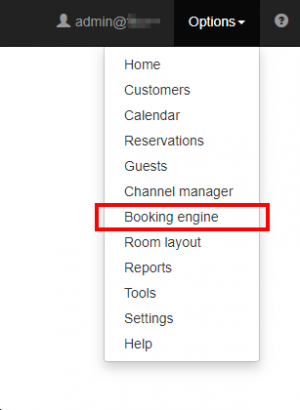
The next step is to login to your hoteliga account and navigate to the Booking Engine settings by using the top-right menu:
In the page that loads do the following:
- Make sure that the status of the booking engine is Inactive. If not, click on the switch do deactivate it.
- Click on "User Tracking".
In the following page:
- Type or paste the Google Analytics tracking ID, in the format UA-XXXXXXXX-1 as copied/noted earlier.
- Click on "Save".
This completes the first step to connect Google Analytics to the hoteliga Booking Engine. Read on for further configuration.
Adding a View for the hoteliga Booking Engine
In order to have a dedicated view of the traffic from your hoteliga Booking Engine, you need to add a new view for it.
Login back to your Google Analytics account and:
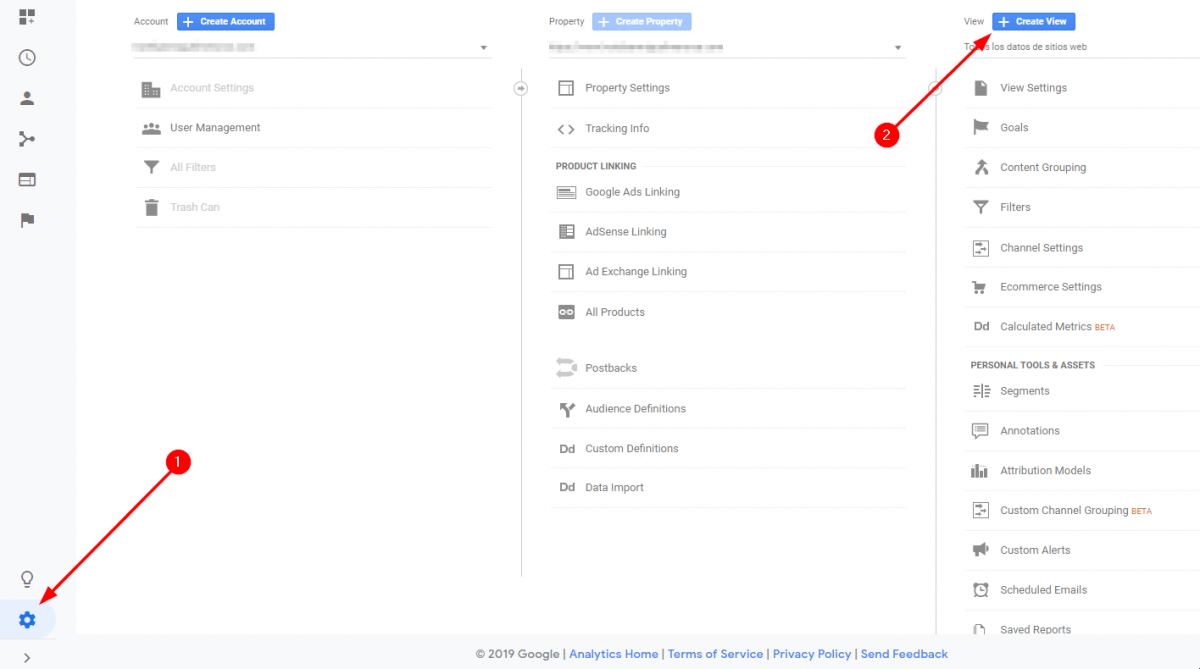
- Click on the "cogs" icon on the bottom-left of the screen.
- Click on the "+ Create View" button on the top-right of the screen.
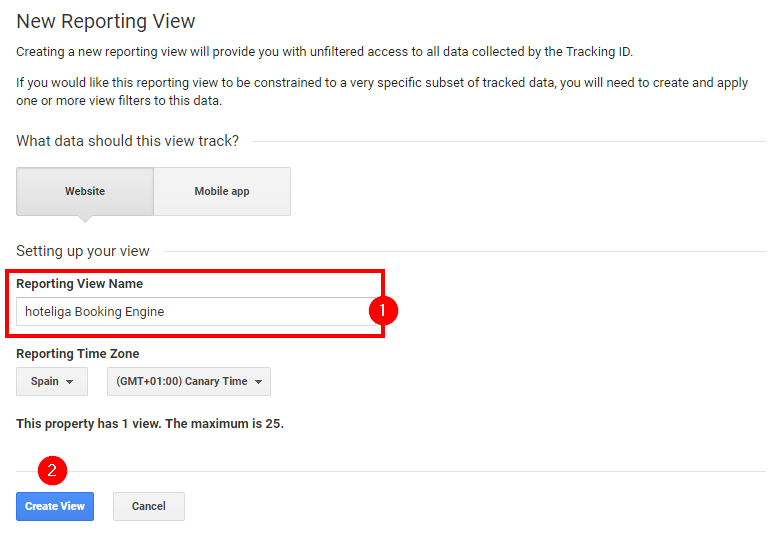
In the next page, do the following:
- In the "Reporting View Name" field, type hoteliga booking Engine.
- Click on the "Create View" button.
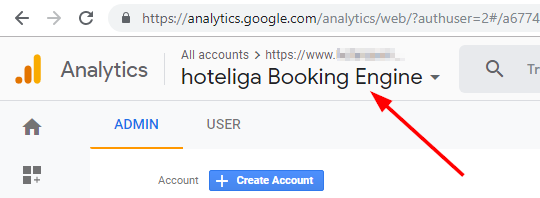
After the creation of the view, you will be automatically transferred to the new view, as seen in the top-left drop-down selector:
Adding a Filter for the hoteliga Booking Engine
Under the new view created in the previous step named "hoteliga booking Engine" there is no data or traffic tracked yet. That is because the hoteliga Booking engine, although having the Google Analytics tracking ID registered in the previous step, is not linked to Google Analytics as a hostname, which is book.hoteliga.com.
To achieve this, a filter needs to be created under the "hoteliga booking Engine" view.
Follow the following steps:
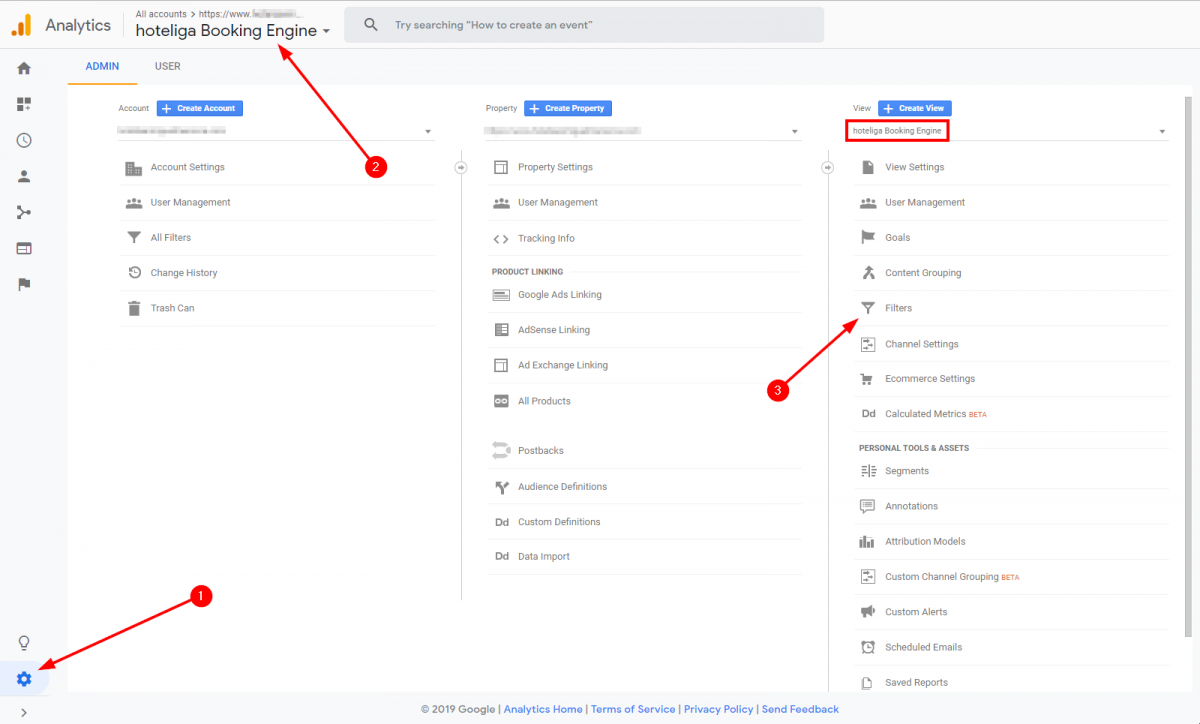
- Click on the "cogs" icon on the bottom-left of the screen.
- Make sure you are under in the "hoteliga Booking Engine" view.
- In the "View" column, click on "Filters".
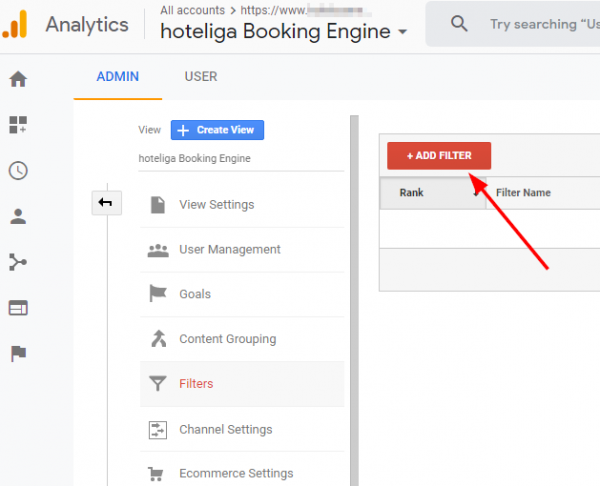
In the following page that loads click on the "Add Filter" button:
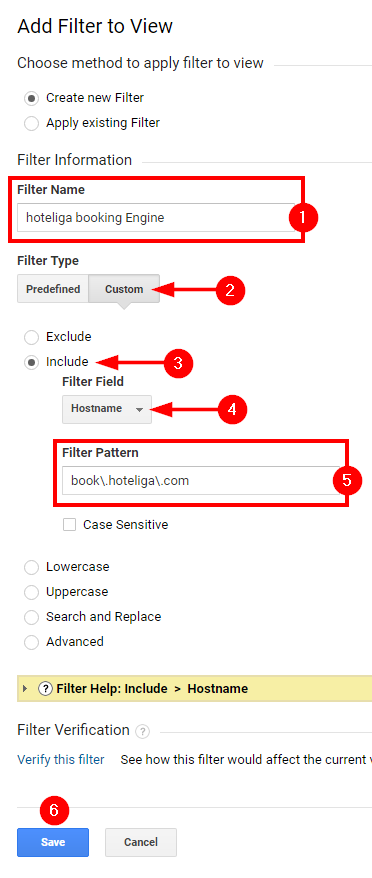
In the next page do the following:
- Type "hoteliga Booking Engine" in the field "Filter Name".
- Select "Custom" for the "Filter Type".
