Difference between revisions of "Create a page"
| (11 intermediate revisions by the same user not shown) | |||
| Line 13: | Line 13: | ||
| − | In the field '''Content''' place the cursor where you want to enter the QR code[[File:Cursor.png]] | + | In the field '''Content''' place the cursor where you want to enter the QR code[[File:Cursor.png|600px]] |
Click on the option '''Insert image''': | Click on the option '''Insert image''': | ||
| − | [[File:Insert img.png]] | + | [[File:Insert img.png|800px]] |
* On the field '''Source''' add the link : | * On the field '''Source''' add the link : | ||
| Line 24: | Line 24: | ||
<ins style="color: blue">'''Example:'''</ins> | <ins style="color: blue">'''Example:'''</ins> | ||
| − | + | ||
| − | For the domain with the name "besthoteliga" the link should be: | + | ''For the domain with the name "besthoteliga" the link should be: |
| − | + | '' [[File:Qr link new.png|500px]] | |
| + | |||
| Line 35: | Line 36: | ||
* On the tab '''Dimensions''' you will need to add the value 200 x 200. | * On the tab '''Dimensions''' you will need to add the value 200 x 200. | ||
| − | [[File:Edit img.png]] | + | [[File:Edit img.png|800px]] |
The QR code will be visible after a document has been uploaded on my data and has received a MAPK. | The QR code will be visible after a document has been uploaded on my data and has received a MAPK. | ||
| − | [[ | + | [[File:Invoice.png|800px]] |
Latest revision as of 10:54, 13 December 2023
According to the new regulations of the ministry of finance, every business has to include a QR code on all of their documents. This requirement is becoming mandatory from the 1st of January 2024. With this change the recipient is able to immediately check the validity of the document's transmission.
The above provision requires the transmission of the document to precede it's delivery to the recipient.
This article was created to assist the user on importing the necessary QR code to the document templates.
How to make these changes to your templates
In order to customize and display the QR code that corresponds to the MARK number of the document, you must follow the bellow procedure:
Go to the Options > Settings > Templates menu, where you will select the template you want to edit.
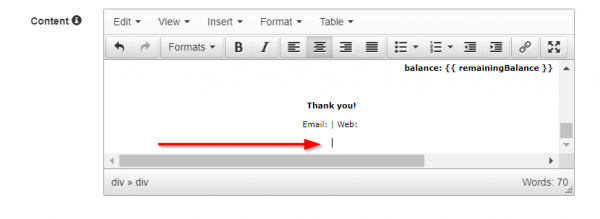
In the field Content place the cursor where you want to enter the QR code
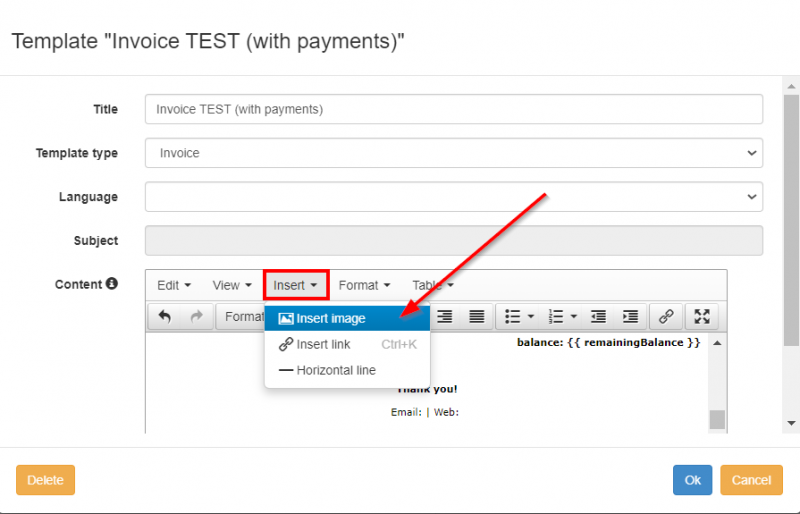
Click on the option Insert image:
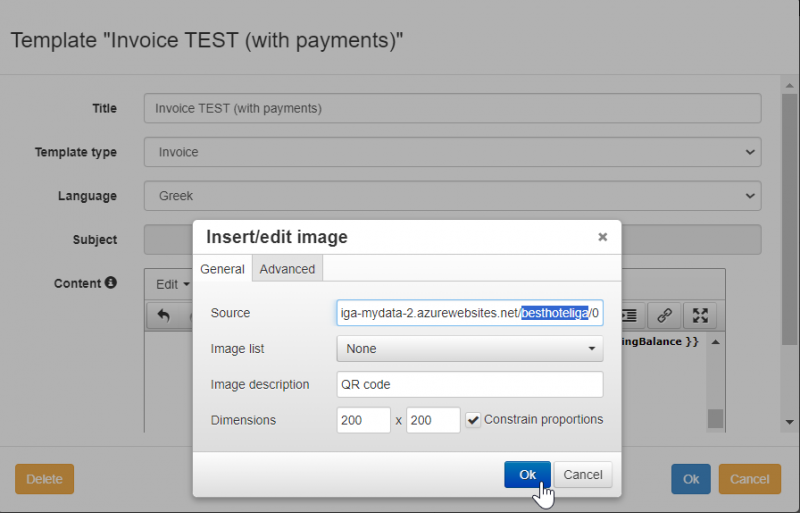
- On the field Source add the link :
https://hoteliga-mydata-2.azurewebsites.net/{domainname}/0 , where {domainname} is the name of your domain.
Example:
For the domain with the name "besthoteliga" the link should be:
![]()
- on the tab Image list please leave the option Νone
- On the tab Image description you can add a description "QR code" or something similar. You have also the option to leave the field blank.
- On the tab Dimensions you will need to add the value 200 x 200.
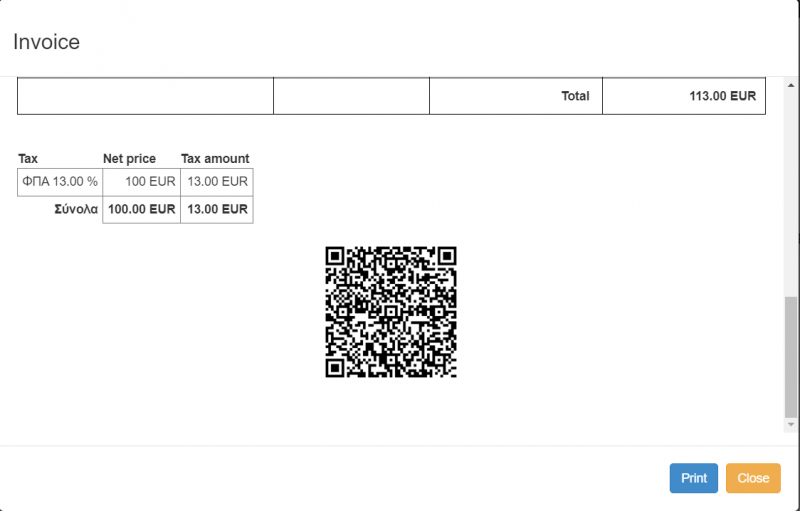
The QR code will be visible after a document has been uploaded on my data and has received a MAPK.


